
Saturday, January 21, 2012
Bread! And other things
I have no idea when this turned from a renovation blog into a food/technology/randomness blog, but it looks like it was right around the time of the great structural engineering debacle, which resulted in such a complex dependency chain of stuff, that we have ground to a halt on construction progress. Alas.
Oh well, with the new Apple news about iBooks Author, I have been putting together a miniature iPad version of my cookbook and beta testing recipes and trying my best to take pictures of them.
I decided to take a break today to try out this Artisan Bread in Five Minutes a Day thing. WOW that actually works! I am impressed. The link above is the site I used to get the main recipe.
Here's what it looked like when it was done with it's first, 2 hour rise:
And here's what it looks like when I was done baking my first loaf:
Read more >>
Oh well, with the new Apple news about iBooks Author, I have been putting together a miniature iPad version of my cookbook and beta testing recipes and trying my best to take pictures of them.
I decided to take a break today to try out this Artisan Bread in Five Minutes a Day thing. WOW that actually works! I am impressed. The link above is the site I used to get the main recipe.
Here's what it looked like when it was done with it's first, 2 hour rise:
 |
| This does not look like any bread dough I have ever seen. |
 |
| Dude, this looks like ACTUAL bread! |
The deal is that you make a very low-effort, wet dough and then leave it in your fridge for a few weeks. When you want bread, take some out, let it rest, and then bake it. I am pretty happy with it. I am going to try it out to be naan next. Woo naan!
So try it out. Those folks are getting my $15 for the iPad version by the end of the day. Love!
My only complaint is that the container they recommend you buy (which looks awesome) is BPA plastic (which is arguably not awesome). To be honest, I am not really convinced either way about BPA, but I have a small child at home, and I see no reason to tempt fate. Or tempt cancer. Or both.
The answer appears to be "buy the OXO thing that's approximately equivalent". Really, that's the right answer enough that I should probably just try OXO first for kitchen stuff.
So hey. Have you tried this bread? Any cool tips or variations?
Anything you want to share about BPA?
Hope everyone is having a good January so far.
Monday, January 9, 2012
A Few More Food Pix
 |
| Black Beans |
but in any case, yesterday I posted a bunch of photographs where foods were begin directly lit with a makeshift light (my husbands work clamp lamp thingy -- tat's the technical term!). Today I learned that is called 'specular' light and that if you filter your light with something, it's called 'diffuse' light. Apparently, the 120 degree direct angle from yesterday is supposed to emulate late afternoon sunshine. Diffuse lighting (the filtered one) is closer to an overcast day. Cool.
I don't have a big piece of anything official to filter the light with, but we got something in the mail last week that was wrapped in bubble wrap, which is TOTALLY translucent, so I used that.
 |
| This would be a nice picture if that tomato wedge didn't look like an ear. |
Honestly, this still looks late-afternoon-ey too me, so I'm not sure if the bubble wrap is not diffuse enough, or if I should have the light further away. Not sure.
 |
| A little more diffuse |
I should mention that black beans do not make super pretty food pics, and that I sprayed them with cooking spray so they'd look more shiny and pretty. They look oddly like coffee beans to me. *shrug*
Sunday, January 8, 2012
Lighting Food Pictures
So, I have been experimenting with some lighting stuff to take better pictures of my food. (See also recent post where I am gonna need to take pictures for my perhaps e-book cookbook I mostly wrote and now need to field test and take pictures of.)
So, I read a bunch of things and watched some videos online and set up to practice some things today in my kitchen. I did not want to buy any fancy lighting equipment yet, but my husband had some clamp work lights, so he gave me one of those. I started with a 60 watt clear regular lightbulb, set at a few feet away, about 120 degrees off set from my camera, using the food as the center of a circle. Actually, I guess that's negative 120 degrees. Math is slowly coming back to me. So, I tried that.
It was just a regular lightbulb. You can put flood light bulbs in the work clamp lights, but man, those are BRIGHT. So anyway, you can see a lot of shadow on the right side (light was on the left).
OK, take two, I set up a white reflected card (which was actually a white piece of funny foam stuff from Joann's, since that was like a dollar and buying actual photographic white card seemed like it might be expensive.) I set that up between 90 and 120 degrees positive. (So basically the other side of the food).
White reflects a lot of light back, and everything looks more bright with the shadows on the right side. Kinda nice. I did try one more thing.
So yeah, I propped up my laptop as a reflector card. Brushed silver is apparently thing. I actually like it the best. I suspect because it was more shiny and thus more reflective than the foam, which is pretty much matte. Really, though, all if it seems a little bit too high contrast for me. So I decided to lower the wattage of the light bulb and switched to a ceiling fan 40 watt bulb.
I also switched everything around, because I think the peppers are naturally too shiny, and I was trying to get a handle on this diffuse light thing.
I think I like the melamine tray the best for my faux reflector card. I was really pretty happy with how that one turned out. It's kinda glowy or something.
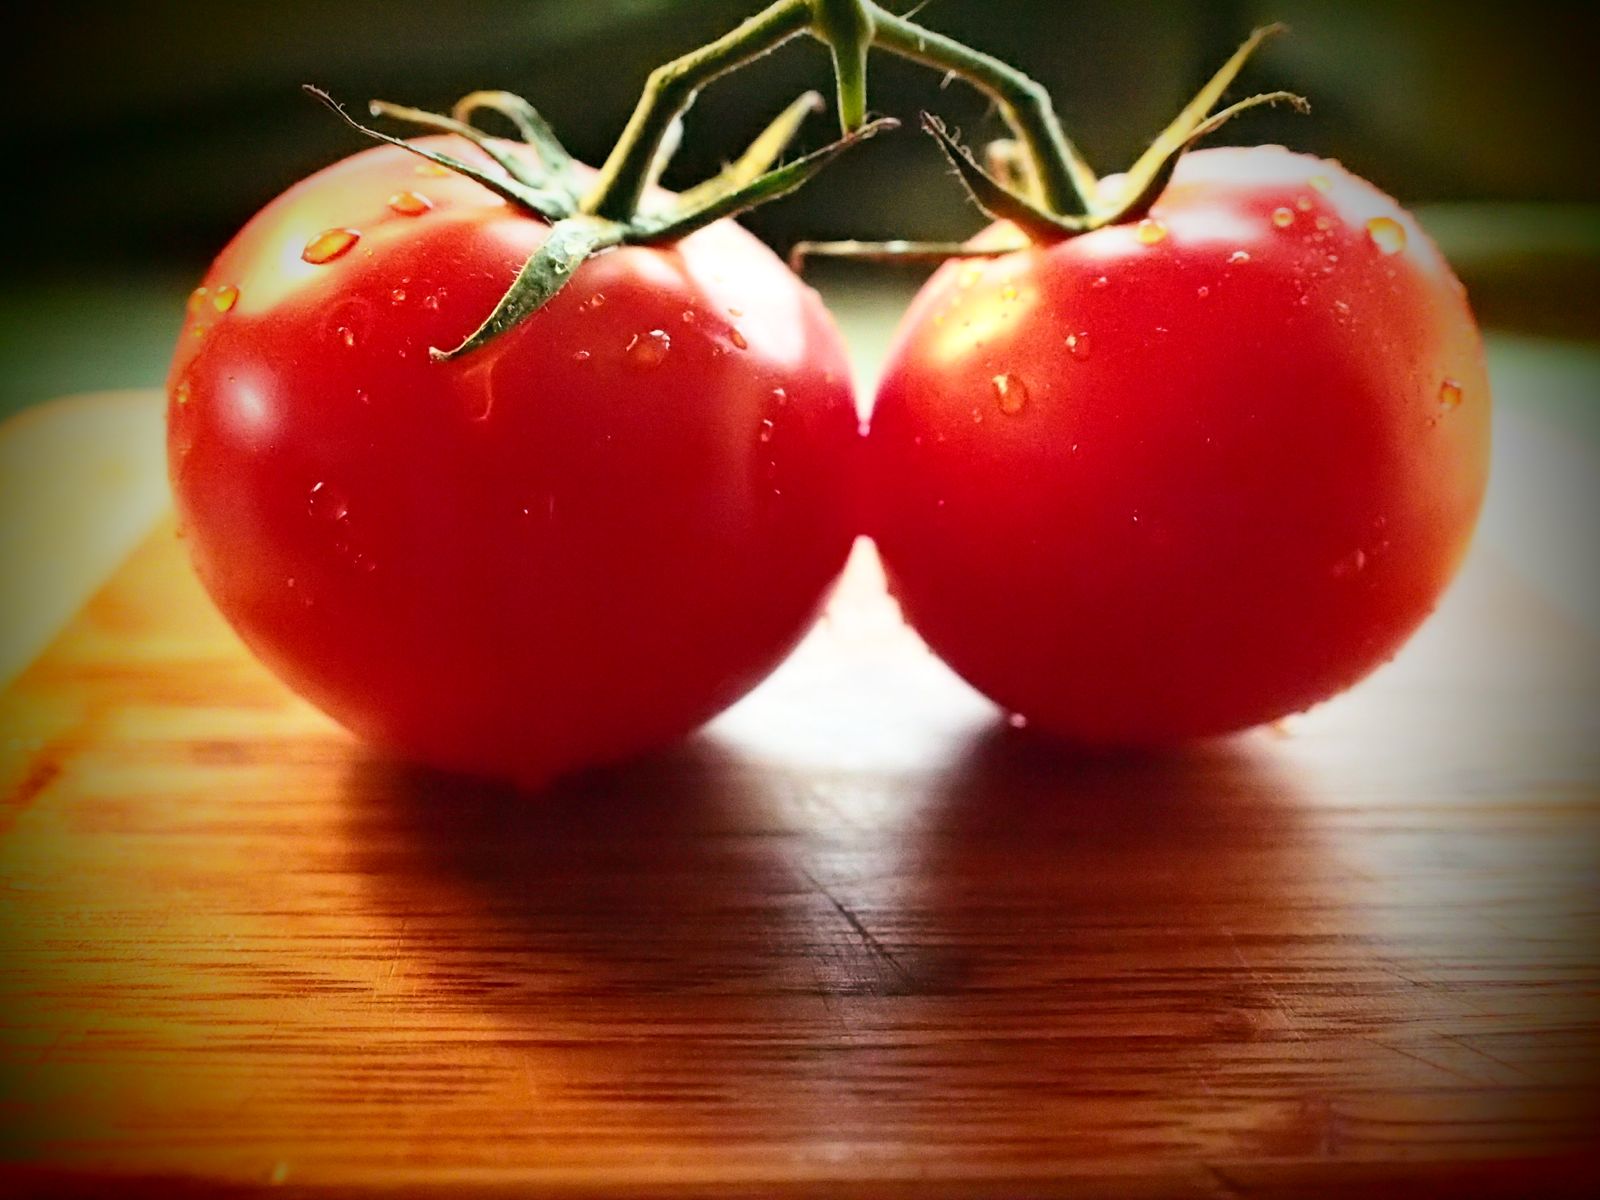
I oiled my poor, unloved, bamboo cutting board to make it prettier. (Don't neglect your cutting boards, folks, mine is split and sad.) I rinsed off the tomatoes because ... I don't know exactly; I think I always rinse off food when I am about to use it. I really liked this one a lot. Still glowy, nice water drops. It's not perfect food photos, but I thought it was pretty nice for basically being homework.
I broke out my bigger cutting board and was too lazy to oil it, but I added some other foods to make a sort of scene out of it. I really nee to work on aperture and focus but I thought this was pretty OK.
Read more >>
 |
| -120 degree light offset, 60watt clear |
OK, take two, I set up a white reflected card (which was actually a white piece of funny foam stuff from Joann's, since that was like a dollar and buying actual photographic white card seemed like it might be expensive.) I set that up between 90 and 120 degrees positive. (So basically the other side of the food).
 |
| same as above, plus a white reflector card |
White reflects a lot of light back, and everything looks more bright with the shadows on the right side. Kinda nice. I did try one more thing.
 |
| Used my mac laptop as a brushed silver reflector card |
So yeah, I propped up my laptop as a reflector card. Brushed silver is apparently thing. I actually like it the best. I suspect because it was more shiny and thus more reflective than the foam, which is pretty much matte. Really, though, all if it seems a little bit too high contrast for me. So I decided to lower the wattage of the light bulb and switched to a ceiling fan 40 watt bulb.
I also switched everything around, because I think the peppers are naturally too shiny, and I was trying to get a handle on this diffuse light thing.
 |
| 40 watts, no reflector card |
 |
| 40 watts, back to the white foam |
 |
| I used a white melamine tray instead of the foam |
Here's some shots I took with my iPhone of the setup for taking these pictures. They are not great because it was kind of hard to figure out what to take of, but maybe they will be illustrative.
 |
| top view, pretend the white card was held up by something |
 |
| Side view, continue to assume that card is being held up |
 |
| super closeup. ignore my dishes, ok? thanks |
I started to put everything away, but I realized that a lemon was not all that exciting and that I had some other food I could play with. (Yay playing with one's food!)
 |
| same setup, with tomatoes |
 |
| More food, un-oiled cutting board |
A few things:
- The differences are both subtle and dramatic with the reflector card, but you don't have to have anything fancy, so that's nice. I used a plate stand from my china and some white stuff I had around. The white card was really RIGHT up close to the right hand side of the food, though. Basically barely out of the shot.
- I had much better results when I started putting my camera right up next to the food. Because I have such a short lens, that means super close. If you have a longer lens, you might be able to be further away.
- These are the five or ten good shots out of maybe 50 or 60 total. Digital photography means volume is your friend! So wiggle around a little and stuff, until you get something you like, and throw the rest of what you don't like away.
- These are all straight out of the camera, no editing, no color correcting, using my camera's incandescent white balance. So nothing fancy and no post processing, which would probably help a bunch of them. Still, it shows what the different lights and stuff do.
- I have windows in my kitchen, so there was ambient/extra light in the room.
- I have a semi-fancy interchangeable lens camera. (Olympus Pen E-p3). Not a DSLR but still pretty nice. I am somewhat convinced, though, that you can get pretty good results with good lighting and a point and shoot, so that's something to think about. Case in point, I took this picture with the same lighting setup with the lemon. Not great, but not totally terrible. I probably needed more overall light with this.
 |
| not awful for an iPhone |
I don't want to end my post with that, so here is that pretty tomato picture again.
|
| pretty tomatoes! |
Thursday, January 5, 2012
Busy Bee Me
So, hey guys, I kind of wrote a draft of a cookbook. Most of one, anyway.
We're pescetarian, so that knocks out a whole bunch of cookbooks for us. On top of that, because we both work such long hours, we end up all getting home at 6:30 and with a 4 year old, we really need to eat now now now. If you take 45 minutes to cook dinner, and your kid's bedtime is 8pm, you are basically setting yourself up to never see your kid or never have time to give him a bath and read him a story!
So I usually cook a lot of stuff and freeze it. Lately, I have been really experimenting with freezing, slow cookers, rice cookers, and meals that cook up super quick. In order to keep track of them better for when I'm doing my weekly meal planning, I started to make a binder of recipes. On Saturday mornings, my husband makes us pancakes and I set at the breakfast bar and have pancakes and coffee and make my grocery list and having the binder makes it much easier.
I'm not entirely sure what to do with it, but I am thinking that maybe self publishing an e-book is an option? Dunno.
Next up, though, I will be mastering food photography and then field testing my recipes! Today, I watched a bunch of videos and got some great tips with things like using floral cards to hold up reflecting cards and using holding a lit incense stick briefly over a cup of hot coffee to fake some steam. Awesome!
In any case, I sent a few things to friends to field test and tested this one out myself tonight. (I am not really a cook who measures stuff, so it was kind of important to test.) Here ya go!
Read more >>
We're pescetarian, so that knocks out a whole bunch of cookbooks for us. On top of that, because we both work such long hours, we end up all getting home at 6:30 and with a 4 year old, we really need to eat now now now. If you take 45 minutes to cook dinner, and your kid's bedtime is 8pm, you are basically setting yourself up to never see your kid or never have time to give him a bath and read him a story!
So I usually cook a lot of stuff and freeze it. Lately, I have been really experimenting with freezing, slow cookers, rice cookers, and meals that cook up super quick. In order to keep track of them better for when I'm doing my weekly meal planning, I started to make a binder of recipes. On Saturday mornings, my husband makes us pancakes and I set at the breakfast bar and have pancakes and coffee and make my grocery list and having the binder makes it much easier.
 |
| We also turned this... |
 |
| and this |
 |
| into this |
... so now I have a chalkboard with all my meals for the week somewhere I can check them every morning
In any case, I just kept going and going with the recipe collection, and it turned into a cookbook. Nifty!
I'm not entirely sure what to do with it, but I am thinking that maybe self publishing an e-book is an option? Dunno.
Next up, though, I will be mastering food photography and then field testing my recipes! Today, I watched a bunch of videos and got some great tips with things like using floral cards to hold up reflecting cards and using holding a lit incense stick briefly over a cup of hot coffee to fake some steam. Awesome!
In any case, I sent a few things to friends to field test and tested this one out myself tonight. (I am not really a cook who measures stuff, so it was kind of important to test.) Here ya go!
Pepper Poached Eggs & Toast
- 1 or 2 tablespoons olive oil
- 1 small onion, minced
- 2 cloves of garlic, minced
- 1 tablespoon smoked paprika
- 2 red bell peppers, diced
- 15 ounce can of diced tomatoes
- about a 1/4 cup hot sauce
- 4 raw eggs
- flatbread or sourdough baguette for serving
Heat the olive oil in a large pan with a lid over medium heat, and fry the onion for about two minutes.
Add the garlic, smoked paprika and bell peppers and continue to cook for another 4 or 5 minutes.
Add the diced tomatoes, trying to pick up any browned bits from the bottom of the pan. Stir in the hot sauce (i like 1/4 cup, but you might like less or more, it’s up to you.)
Using your spoon, make four wells in the pan, moving the tomato and peppers to the side, but making sure to leave some liquid in each well.
Crack one egg into each well and cover the pan. Simmer for about 10 minutes or until the eggs are cooked through.
Serve with flatbread or the baguette. (Or tonight we had it with just plain toast, cause that's what we had!)
Monday, January 2, 2012
Structural Engineering
It all started with a door around Thanksgiving.
The old kitchen (a.k.a. the Room of Despair) is visible from the front door. Since we were having about 10 guests for Thanksgiving, I asked my husband to put a door up in the doorway, so that we could close it and our guests didn't have to look at the gigantic mess and lack of walls and exposed electrical.
(OK, technically, there are two doors, but the other is in the dining room, so I put up a curtain there, and wheeled the kegerator right up to the door. It was awesome! )
In any case, we had a door that we thought went there, so Jeff tried to put it up. Denied! The doorway, however, was totally not square in any way. This somehow turned into us calling a structural engineer, because Jeff was pretty sure the house was not square if the doorway was not square. Which hey, turns out to be true.
The short answer is: shore up some stuff in the next 5 years. Which is really no big deal, but does put our next set of work into a different order than we intended.
Mainly, we need to do the upstairs bath before the 1st floor bath. This is because we need to sister up a bunch of joists and that's easier to do if we work from the top down. (The upstairs bath is over the Room of Despair, which is gonna become the 1st floor powder room, someday.)
Here's some pics.
Above you can see where we'll be rerouting the plumbing for the main bath and powder rooms and sistering the joists (which apparently means adding a joist to each side of the original joist to add support).
I gotta say, that does look like something that's gonna break. This is just one example, we have about five or six of these. So basically, we are going to tear out the floor of the main bath (after working up the plumbing in advance to make the remodeling go faster) and add the sister joists from above.
Here's a shot of how the steps to our basement are not actually held up by anything.
See the big pole? That's holding up the house. More on that later. To the left of that, you see a 2X4, right? Except it was chopped off.
That is supposed to be touching the floor, holding up the steps. Those steps have always seemed super rickety to us, so it's completely unsurprising. We shoved a 4X4 under neath to hold the steps up for now. Those babies will be going bye bye and being replaced with new steps.

Here's the top of the aforementioned post. If you look, you can see some wood shims above the post. That's apparently a no-no, said our structural engineer. We are smack dab in the middle of a period of building for our house when people used that kind of post with wood shims. Wood moves, expands, contracts. Which it did, and now our house isn't level. Metal shims will need to go in there.
We asked about jacking up the house with these things you put under your posts and slowly turn, but the engineer said that probably will just result in other craziness happening in the above floors, so instead we need to double the number of posts. (We have 3, going to 6.)
That involves jackhammering out some concrete in the floor, pouring a new concrete bed, and then putting in 3 new metal posts in. 2X the posts = 4X the support.
So, cool.
The downside to the new posts is that we will need to tear out the existing hardwood and put in a new, level subfloor. We were hoping that if we jacked the house up a bit, we could refinish the original floors. But, you know, the original floors are like 90 years old, so it's not the end of the world.
We are leaving the awful, boring beige carpet for now, because we have a wall to demo and rebuild in the living room and there's no reason to do that all over my brand new floor. (Plastic brick, people? Really?)
We are both fairly convinced to put in some laminate after that, since with the dogs and the son, we could use something indestructible. In the old house, the hardwood got super scratched up, so we'll see.
Read more >>
The old kitchen (a.k.a. the Room of Despair) is visible from the front door. Since we were having about 10 guests for Thanksgiving, I asked my husband to put a door up in the doorway, so that we could close it and our guests didn't have to look at the gigantic mess and lack of walls and exposed electrical.
(OK, technically, there are two doors, but the other is in the dining room, so I put up a curtain there, and wheeled the kegerator right up to the door. It was awesome! )
In any case, we had a door that we thought went there, so Jeff tried to put it up. Denied! The doorway, however, was totally not square in any way. This somehow turned into us calling a structural engineer, because Jeff was pretty sure the house was not square if the doorway was not square. Which hey, turns out to be true.
The short answer is: shore up some stuff in the next 5 years. Which is really no big deal, but does put our next set of work into a different order than we intended.
Mainly, we need to do the upstairs bath before the 1st floor bath. This is because we need to sister up a bunch of joists and that's easier to do if we work from the top down. (The upstairs bath is over the Room of Despair, which is gonna become the 1st floor powder room, someday.)
Here's some pics.
 |
| It turns out, you are not supposed to cut big holes in your joists to route plumbing. |
 |
| Another view of that. |
Above you can see where we'll be rerouting the plumbing for the main bath and powder rooms and sistering the joists (which apparently means adding a joist to each side of the original joist to add support).
I gotta say, that does look like something that's gonna break. This is just one example, we have about five or six of these. So basically, we are going to tear out the floor of the main bath (after working up the plumbing in advance to make the remodeling go faster) and add the sister joists from above.
 |
| You should ignore the boxes we never unpacked and our nonfunctioning roomba. |
See the big pole? That's holding up the house. More on that later. To the left of that, you see a 2X4, right? Except it was chopped off.
That is supposed to be touching the floor, holding up the steps. Those steps have always seemed super rickety to us, so it's completely unsurprising. We shoved a 4X4 under neath to hold the steps up for now. Those babies will be going bye bye and being replaced with new steps.

Here's the top of the aforementioned post. If you look, you can see some wood shims above the post. That's apparently a no-no, said our structural engineer. We are smack dab in the middle of a period of building for our house when people used that kind of post with wood shims. Wood moves, expands, contracts. Which it did, and now our house isn't level. Metal shims will need to go in there.
We asked about jacking up the house with these things you put under your posts and slowly turn, but the engineer said that probably will just result in other craziness happening in the above floors, so instead we need to double the number of posts. (We have 3, going to 6.)
That involves jackhammering out some concrete in the floor, pouring a new concrete bed, and then putting in 3 new metal posts in. 2X the posts = 4X the support.
So, cool.
The downside to the new posts is that we will need to tear out the existing hardwood and put in a new, level subfloor. We were hoping that if we jacked the house up a bit, we could refinish the original floors. But, you know, the original floors are like 90 years old, so it's not the end of the world.
We are leaving the awful, boring beige carpet for now, because we have a wall to demo and rebuild in the living room and there's no reason to do that all over my brand new floor. (Plastic brick, people? Really?)
We are both fairly convinced to put in some laminate after that, since with the dogs and the son, we could use something indestructible. In the old house, the hardwood got super scratched up, so we'll see.
 |
| via lumber liquidators website |
This is kinda pretty for laminate.
So that's what's happening for us. You know, besides christmas and stuff.
Merry Belated Christmas and Happy 2012 everyone! May your house not require a structural engineer!
Subscribe to:
Posts (Atom)


